Thursday, September 29, 2011

Giving Thanks........{La Tienda}

Many of you know that I LOVE La Tienda! I love their jewellery and I love the story behind it. For those of you who may not have heard of La Tienda it is a fair trade art co-op serving a group of women in the Dominican Republic, they make beautiful handmade items to sell in order to provide for their families. There are about 30 Haitian and Dominican woman working together where all the income is shared within the group.

With it being so close to Thanksgiving I want to give back and how I am going to do that is by baking cookies.....okay there is a little more to it than that so keep reading.  I plan of baking cookies and donating the profits to the women of La Tienda. 

So this is how you need to go about ordering.....
*Email me at cutiepies@hotmail.ca
*Be sure to include in the email your full name, phone number and amount of Chocolste chip cookies you would like to purchase......they aree selling by the half dozen for $8.00
*Once I receive your email I will send you the address for pickup

Pick up for the cookies will be on October 14th in Orangeville between 6:00pm and 8:00pm.  We will also have La Tienda jewellery displayed so when you pick up your treats you can pick up a lovely piece of art to wear proud.  I am really looking forward to seeing the impact that we can make in these women's lives so please open your hearts and help make a difference.
xox

Wednesday, July 13, 2011

Cinnamon Sugar Pull-Apart Bread

Cinnamon Sugar Pull-Apart Bread
*If you are not into making your own dough pull out the bread maker*


Makes: one 9x5x3-inch loaf
Recipe adapted from:  Joy the baker

For the Dough:
2 3/4 cups plus 2 tablespoons all-purpose flour
1/4 cup granulated sugar
2 1/4 teaspoons (1 envelope) active dry yeast
1/2 teaspoon salt
2 ounces unsalted butter
1/3 cup whole milk
1/4 cup water
2 large eggs, at room temperature
1 teaspoon pure vanilla extract

For the Filling:
1 cup granulated sugar
2 teaspoons ground cinnamon
1/2 teaspoon fresh ground nutmeg
2 ounces unsalted butter, melted until browned

In a large mixing bowl (I used just the bowl of my stand mixer) whisk together 2 cups flour, sugar, yeast, and salt. Set aside.
Whisk together eggs and set aside.
In a small saucepan, melt together milk and butter until butter has just melted. Remove from the heat and add water and vanilla extract. Let mixture stand for a minute or two, or until the mixture registers 115 to 125 degrees F.
Pour the milk mixture into the dry ingredients and mix with a spatula. Add the eggs and stir the mixture until the eggs are incorporated into the batter. The eggs will feel soupy and it’ll seem like the dough and the eggs are never going to come together. Keep stirring. Add the remaining 3/4 cup of flour and stir with the spatula for about 2 minutes. The mixture will be sticky. That’s just right.
Place the dough is a large, greased bowl. Cover with plastic wrap and a clean kitchen towel. Place in a warm space and allow to rest until doubled in size, about 1 hour. *The dough can be risen until doubled in size, then refrigerated overnight for use in the morning. If you’re using this method, just let the dough rest on the counter for 30 minutes before following the roll-out directions below.
While the dough rises, whisk together the sugar, cinnamon and nutmeg for the filling. Set aside. Melt 2 ounces of butter until browned. Set aside. Grease and flour a 9x5x3-inch loaf pan. Set that aside too.
Deflate the risen dough and knead about 2 tablespoons of flour into the dough. Cover with a clean kitchen towel and let rest for 5 minutes. On a lightly floured work surface, use a rolling pin to roll the dough out. The dough should be 12-inches tall and about 20-inches long. If you can’t get the dough to 20-inches long… that’s okay. Just roll it as large as the dough will go. Use a pastry brush to spread melted butter across all of the dough. Sprinkle with all of the sugar and cinnamon mixture. It might seem like a lot of sugar. Seriously? Just go for it.
Slice the dough vertically, into six equal-sized strips. Stack the strips on top of one another and slice the stack into six equal slices once again. You’ll have six stacks of six squares. Layer the dough squares in the loaf pan like a flip-book. Place a kitchen towel over the loaf pan and allow in a warm place for 30 to 45 minutes or until almost doubled in size.
Place a rack in the center of the oven and preheat to 350 degrees F. Place loaf in the oven and bake for 30 to 35 minutes, until the top is very golden brown. The top may be lightly browned, but the center may still be raw. A nice, dark, golden brown will ensure that the center is cooked as well.
Remove from the oven and allow to rest for 20 to 30 minutes. Run a butter knife around the edges of the pan to loosen the bread and invert onto a clean board. Place a cake stand or cake plate on top of the upside down loaf, and carefully invert so it’s right side up.
I think this bread is best served the day it’s made, but it can also we wrapped and kept at room temperature for up to 2 days just be sure to serve it warm it is just not the same if you don't heat this up!

Tuesday, June 28, 2011

Chocolate Biscotti.......if you don't like Biscotti I promise you will love this one!

I never liked biscotti but over Christmas I thought it would be great to bake them as they keep really well for a couple of weeks and also hold up great in the mail:)  I had to play around with a few recipes to find one that I liked and below is the one that finally worked for me!.....also I am very aware that this is all underlined but for the life of me I could not figure out how to take it off!!!!!!!!!

Chocolate Biscotti
Yield: 18 per batch

Ingredients:

1/2 cup unsweetened cocoa powder
3/4 tsp. baking soda
1/4 tsp. baking powder
1 tsp. salt
1/2 cup unsalted butter, at room temperature
1 cup sugar
2 large eggs, lightly beaten
1 tsp. vanilla extract
1 cup white chocolate chips
8 oz. white chocolate, chopped or chips to dip or drizzle over the biscotti
Directions:
Center a rack in the oven and preheat to 350 degrees F.  Line a baking sheet with parchment paper.
Sift together the flour, cocoa powder, baking soda, baking powder and salt.
In the bowl of a stand mixer fitted with the paddle attachment, beat the butter and sugar together on medium speed until pale, about 2 minutes; the mixture may be crumbly.  Scrape down the sides of the bowl, add the eggs and the vanilla and beat for another 2 minutes.  Reduce the mixer speed to low and mix in the dry ingredients in three additions, mixing only until a dough forms.  Scrape down the sides of the bowl.  Mix in the white chocolate chips.  Turn the dough out onto a work surface and knead in any dry ingredients that might have escaped mixing.
Sprinkle some flour on a clean work surface.  Dust your hands with some flour – the dough may be very sticky.  Divide the dough in half.  Working with one half at a time, roll the dough into 10-inch logs.  Transfer logs onto the baking sheet.  Flatten both logs so that they are 1/2 to 1 inch high and at least 4 inches apart.
Bake the logs for at least 25 minutes, or until are just slightly firm.  The logs will spread and crack during baking.  Remove the baking sheet from the oven, place on a wire rack and allow to cool for about 20 minutes.  Working with one log at a time, cut each log into slices 1/2 to 3/4 inch thick.  Stand the slices up on the baking sheet.  Bake the cookies again, this time for 10 minutes.  Transfer to a rack to cool.
Melt white chocolate in a double boiler.  Dip the cooled biscotti into the white chocolate or drizzle over top and set to cool on a silicone mat or some wax paper.
 Enjoy
xox
2 cups all-purpose flour, plus some extra for dusting

Friday, June 24, 2011

When I was in New York last year I went to Magnolias's bakery and fell in love!  Here is their vanilla cupcake recipe which I use all the time.  If you like replace the vanilla with vanilla bean paste for vanilla bean cupcakes.

Cupcakes:

  • 1 1/2 cups of self-rising flour
  • 1 1/4 cups all-purpose flour
  • 1 cup (2 sticks) unsalted butter, softened
  • 2 cups sugar
  • 4 large eggs, at room temperature
  • 1 cup milk
  • 1 teaspoon vanilla

Directions

Preheat oven to 350 degrees F.

Line 2 (1/2 cup-12 capacity) muffin tins with cupcake papers.

In a small bowl, combine the flours. Set aside.

In a large bowl, on the medium speed of an electric mixer, cream the butter until smooth. Add the sugar gradually and beat until fluffy, about 3 minutes. Add the eggs, 1 at a time, beating well after each addition. Add the dry ingredients in 3 parts, alternating with the milk and vanilla. With each addition, beat until the ingredients are incorporated but do not over beat. Using a rubber spatula, scrape down the batter in the bowl to make sure the ingredients are well blended. Carefully spoon the batter into the cupcake liners, filling them about 3/4 full. Bake for 20 to 25 minutes, or until a cake tester inserted into the center of the cupcake comes out clean.

Cool the cupcakes in tins for 15 minutes. Remove from the tins and cool completely on a wire rack before icing.

Vanilla Buttercream
The vanilla buttercream we use at the bakery is technically not a buttercream but actually an old-fashioned confectioners' sugar and butter frosting. Be sure to beat the icing for the amount of time called for in the recipe to achieve the desired creamy texture.

2 cups (1 stick) unsalted butter, softened
6 to 8 cups confectioners' sugar
1/4 cup cream
2 teaspoons vanilla extract

Place the butter in a large mixing bowl. Add 4 cups of the sugar and then the cream and vanilla. On the medium speed of an electric mixer, beat until smooth and creamy, about 3 to 5 minutes. Gradually add the remaining sugar, 1 cup at a time, beating well after each addition (about 2 minutes), until the icing is thick enough to be of good spreading consistency. You may not need to add all of the sugar. If desired, add a few drops of food coloring and mix thoroughly. (Use and store the icing at room temperature because icing will set if chilled.) Icing can be stored in an airtight container for up to 3 days.

Yield: enough for 2 dozen cupcakes or 1 (9-inch) layer cake
Enjoy,
xox

Tuesday, June 14, 2011

Chocolate Chip Cookies

I have to say these are the best Chocolate Chip Cookies I have ever made in my life! I have been baking them for ten years now and have had no complaints just moans and groans about how these are the BEST chocolate chip cookies I have ever had.  So now because I love you all so much I thought I would share this recipe.......and it came from the one and only MARTHA STEWART.

Chocolate Chip Cookies
*makes about 3 dozen*
2 cups flour
1 tsp baking soda
1 tsp salt
1 cup of butter(room temp)
1 cup sugar
1/2 cup packed brown sugar
2 tsp vanilla
1 large whole egg and 1 large egg white
12 ounces of chocolate chips

1. Preheat oven to 350, line a baking sheet with parchment paper; set aside.  In a medium bowl, whisk together four, baking soda and salt; set aside.  In the bowl of an electric mixer fitted with the paddle attachment, beat the butter and both sugars on medium speed until light and fluffy, about three minutes, scraping down the sides when needed.
2.  Add vanilla, whole egg and egg white. beat on low speed until well combined, scraping down the sides of the bowl as needed, about one minute.  Add the flour mixture in two batches; mix until just combined.  Mix in chocolate chips.
3. Shape 2 heaping tablespoons of dough at at time into balls.  bake, rotating sheets halfway thought, until cookies are golden brown about 15 minutes or longer.  Once they are done cool them on a rack.  Cookies can stay at room temperature for 4 days. 
*Some tips*
I usually freeze the dough in ball form so we can have fresh cookies when we want them.  Just freeze them on a cookie sheet first then transfer to a zip lock bag once they are firm.
You can add white chocolate chips to this which is my favorite
I hope you and your family enjoy these puppies as much as we do! xox

Monday, June 13, 2011

RuNNiNG and LoViNG it!!!!!!!

Nine years ago I met my hubby. He was a runner a hard core runner.....he wore those shorty shorts... so short they made me giggle! Nine years ago I tried to run.  I tried really hard and it was just not working for me.  I hated it. I did not get it? What was the point in working out? Who wants to sweat and be in pain?  I gave up and went to Starbucks when Christian went for his runs. 
Something clicked for me nine years later.  I started Bootcamp as a way to relieve my stress a couple of months ago.  I ended up loving it! I realized I could do more than I was giving myself credit.  So one day I laced up my sneakers and went for a run walk.  I would run for five minutes, walk for 1 minute. I was doing okay and I was happy.  The next week I tried to go without stopping and I did it.  You have no idea how proud I am of myself for running.  I have now worked up to doing 5km which is super crazy and I love it.  I try to run everyday and I am now enrolled in a half marathon clinic.  I am not sure about it but I know I can do it! 
I have no pictures of me running or doing Bootcamp so here is a picture of my sneakers taken on my Blackberry:)

Wednesday, June 8, 2011

Family

As most of you may have seen already on my facebook page I have decided to take a little break.  The summer is here and the kitchen has been crazier than ever and I feel like I have been putting my family on the back burner:(  It makes me sad to know that I have been so busy with work and life that I have not be able to give them the attention they need and deserve.  I will still be taking orders just not to the extent that I have been in the past......So please if you need anything at all or get a craving just give me a shout and I would be happy to bake for you.

My crazy husband and crazy daughter!

My mini me and I.......She can drive me up the wall but I just LOVE her to bits

TIme for some summer fun! xox

Wednesday, May 4, 2011

Bella Noche

I got the chance to attend Bella Noche this year as a vendor!!!!!  I am really excited but also very anxious about the show.  I am worried I will bake too much BUT then I worry that I am not baking enough!!!!  I am driving myself a little crazy and over analysing everything. 


Here is a little peak at some of the things you will find at my booth.


Here is the info if you need it....
Friday, May 6 · 6:30pm - 9:30pm

Monora Park Pavilion
633220 Hwy 10
Orangeville, ON
Hope to see you all there! xoxoxox

Tuesday, April 26, 2011

Red Curry with Rice Noodles

Ingredients
3 Chicken Breasts
1 Can of Coconut Milk
2 tsp of Red Curry Paste
1 tbsp of grated Ginger
1/4 cup of Sweet Thia Chili Sauce
1 cup of Chicken or Vegetable Broth
1/2 package of Rice Noodles
3 tbsp of vegetable oil
1/2 Onion sliced thin
1 Red Pepper sliced thin
1 Cup of Broccoli
1 tbsp of salt or to taste

The low down......

*First thing is first read the directions on the box of the rice noodles and let them soak in the water while you are doing all this chopping and simmering.......I have made the mistake of forgetting this step and it was just the end of the world to me*

I also cook the Chicken in the oven with a little salt and pepper until done and chop up until I am ready to use.

In a large pot cook over medium heat with the vegetable oil the Onions until soft. Then add Coconut milk, Red Curry Paste, Ginger, Sweet Thia Chili sauce and Vegetable broth and give it a good stir.  Now you can add the red pepper, broccoli, ginger and chicken let it come to a simmer then let it cook for about 10 minutes or so.  Now you can add the cooked rice noodles.
 
Now take the pot off the heat and let it sit for another 5 minutes......everything should thicken up:)

Enjoy
xox

Monday, April 25, 2011

Lentil Soup

Ingredients
2 Cans of Lentils
1 Carton of Vegetable Broth
2 Cups of water
1 Can of Tomato Paste(the small can)
2 Carrots chopped
1/2 Onion chopped
4 gloves of garlic
4 tbsp Chili powder(You can add more if you like.....I do)
1 tbsp of Cumin
1 tsp salt
1 tsp pepper
3 tbsp Olive oil
1 Lemon

The low down........
Chop up your onions, carrots and garlic( it does not have to be a perfect chop as you will be putting this soup in the blender) cook them over medium heat in the olive oil until the carrots and onions are soft.  Now add the Chili, Cumin, Salt and pepper....now add the tomato paste.  Cook this for about 2 minutes or so.  Now add the Vegetable broth, water and lentils.  Bring it to a simmer then cook for an additional 20 minutes.  Pop into the blender I DO NOT put the lid on as it will pop off on you with the heat so please DO NOT PUT THE LID ON......just fill it half way and place a tea town over the top of the blender.  Once you have blitzed everything you are done.  Put your yummy soup in a bowl and squeeze the lemon into the soup.


Enjoy!
xox

Smoothie.......Banana, Peach &Strawberry.....Oh my!

This is a super easy Smoothie that you can have for breakfast or for a mid day snack!

1 cup of frozen strawberries
1 cup of frozen peaches
1 banana
2 tbsp of honey
about 3 cups of milk.....I use soy milk......I usually put enough milk in the blender that it has covered the fruits

Now pop all this stuff in the blender and give it a good blitz!  That's it your done.  Just pour into your favorite glass and enjoy.

Yum Yum!
xox

Sunday, April 24, 2011

My favorite Salad.....and I am telling ya I am not a Salad Girl

Alright this is pretty easy so it should not take too long to explain how to make this salad.....lets call it Goat Cheese, Chicken with Candied Nuts Salad....Alright now that we got that out of the way here is what you need.
Mixed Greens
Goat Cheese
Grilled Chicken
Balsamic Dressing
Candied Nuts
*Just buy some walnuts or pecans toss some maple syrup on them drizzle some honey add some salt and pepper then roast them for about 20 minutes.....then add a sprinkle of sugar and roast for 5 more minutes*
All you want to do it toss all these things together and you are set....Yummy in my tummy salad:)


Enjoy
xox

Friday, April 22, 2011

Decorating for Easter

Easter is a fun time in our house......well for the most part.....some of our day is spent wondering how much chocolate Rylee ate and oh my gosh next year NO CHOCOLATE!  Every year we cave in and deal with our sugar coma child.
This year Rylee and I decorated the house for Easter which is something we normally don't do.  Here are some pictures of our Easter decorating...........
Thanks The Pink Petunia for creating this SUPER ADORABLE wreath for my front door


Chris at Parsons Florist helped me with this one.....we still had our dried up Christmas decorations until Chris told me that was such a big "no...no" to still have Christmas stuff up in April!!!!!

LOVE......maybe the front mat needs to be replaced?

We asked Stampin Creations to make us an Easter banner!  I think it turned out great:)

Our great dollar store find:)

Even "Moosie" as Rylee calls him needed to be in the Easter spirit

Another great Dollar store find.......we got really lucky there that day!

More Eggs.....what's Easter without lots of eggs

Rylee's hand painted eggs

YUM YUM Chocolate Eggs
Wishing you all a very HAPPY EASTER!
Lots of Love from the Mckenna's
xox

Saturday, April 16, 2011

Cupcake Kids Bake Sale

There are no words to describe the past two days!  As most of you know Rylee and I have been working with my friend Gillian and her daughters on a bake sale to raise money for the The Cupake Kids which raised money for the children of Africa.  It has been crazy.....it has been at times stressful....... and I have had my moments BUT I must admit I feel so full inside that it brings me to tears when I think about what we did today.......but good tears.....happy tears that Rylee and I have touched someones life in a way that is so powerful beyond belief with the help of our Friends. 

For the bake sale we baked and sold and baked about 1000 Cupcakes with some help from Tabitha of Yum Yum Desserts and Leanne from She Takes The Cake........in total we raised....drum roll please.......$2,850.00!

This will provide...
1,425 healthy meals
School fees for 407 children for a month
570 new Bibles
380 blankets
Medical care for 475 children
114 new mattresses
25 new beds
6 months salary for in country staff member
And lots of love, hope, and encouragement!!!!

Here are some pictures of our baking yesterday!  I wish I had some from the bake sale but it was way too busy for me to take any pictures:(

Sprinkles gotta love sprinkles

Sitting pretty
HELLO......Yummy or what?

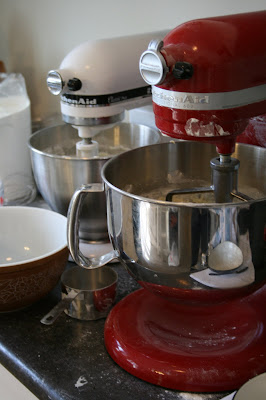
My two mixers were going all day!!!!!!!!!!!!!!!!!!!!!!!!!

And the famous Cupcake Sugar Cookies that I was up until 1:30am making the night before the sale!

More Sugar Cookies

Did I also mention we ate a lot of Cupcakes!
and we had so much fun doing it!

THANK YOU to everyone who baked, donated product, donated their time and who purchased cupcakes you can sleep well tonight that you have helped make an impact in a small child's life.

But before this blog post ends.....sorry if it is going on and on.....but THANK YOU to Grandma, Brenda and Chris for all your help at Gillian's today!  You ladies rock and we could not have gotten through the day without you!!!!!!!!!!
BIG HUGS AND KISSES
Nicole & Rylee


Wednesday, April 13, 2011

OMG Bolognese Sauce and Parmesan & Garlic Salad Dressing


Ingredients

  • ½ cups Olive Oil
  • 1-½ cup Grated Carrots
  • 1 whole Large Red Onion, Diced
  • 2 pounds Ground Beef
  • 4 Tablespoons of Italian Seasoning
  • 1 handful of fresh Basil
  • 1 can (6 Ounce) Tomato Paste
  • 5 cloves Garlic, Minced
  • 1 cup (to 2 Cups) Red Wine*I tend to go for two or more cups....if you don't want wine don't worry about it*
  • 2 cans (28 Ounce) Whole Tomatoes
  • 1 jar of Strained Tomatoes
  • 1 cup Milk
  • 1 cup of Parmesan
  • Salt And Pepper, to taste
  • Fresh Parmesan Cheese

Preparation Instructions

Heat oil in a large pot over medium heat. Add grated carrots and onions and cook for a few minutes. Make a well in the center of the mixture, and then add in the ground beef. Cook for a few minutes until brown, gradually stirring it into the carrot mixture.

Throw in the Italian seasoning and basil. Use fresh if you have it; if you don’t, it’s fine. When the meat is browned and combined with other ingredients, make another well. Add tomato paste and let it heat. Add garlic and stir to combine.  Add about 1 or 2 tablespoons of salt and about 1 tablespoon of pepper.
Make a well in the center of the mixture and add red wine. Stir together. Add canned tomatoes. Finally, pour in milk and Parmesan cheese, stir, and let simmer for 30 minutes to 2 hours—however long you need.  I always give it a little taste before as serve sometimes I find it needs more salt so it all depends on your taste


Serve with pasta and a generous sprinkling of Parmesan cheese.


Parmesean & Garlic Salad Dressing
1 1/2 cups of Olive Oil
3 Cloves of Garlic
1 Cup of Parmesean Cheese
a squirt of lemon
salt and pepper
Toss all these things in a mini food proccessor and give it a blits and you are done!  I have also been know to scoop up the left overs with some fresh bread.....YUMMY.

Hope you all enjoy this and I will post my left overs recipe tomorrow! 

Sunday, April 10, 2011

My Dad

My Dad is an awesome guy!  He is so passionate and always goes for his dreams!  When I was a little one he was a truck driver but he wanted to give his family a better life and went back to school to get into real estate.  I am sure he had many people question, "what are you doing? Are you crazy?  A truck driver can't go into real estate?  Well despite what people might have said or did,  he did it.....it took time but man he did not give up and he ROCKED it. 
I am very happy that all his passion and determination has rubbed off on me.  He has shown me that anything is possible and it is never too late to go for your dreams.  He was my inspiration for starting up Cutie Pies.....I thought if I don't do it now when will I do it?  So I am living my dream everyday and I am very greatful that I had the courage to go and do it.
Love you Dad
xox
Rylee and my Dad


Wednesday, April 6, 2011

How to use your Chicken Tortilla Soup the next day!

So we ate so fast tonight that I never had a chance to take a photo of the dinner we had tonight!  Yesterday I made Chicken Tortilla Soup.....we then had Chicken Tortilla Soup for lunch.......and now for dinner? So I got creative and I made a taco salad.  How do you make a salad out of soup you ask?  Well just listen and I will tell you.  So go dig through your drawers for one of those spoons that have all the holes in it.....go on now start looking I can wait!  Alright now that you have that just put it aside until we need it.

So here is what you need to to.....
Chop up some lettuce and put that on your plate, go and take that spoon and scoop out some of the soup and put it in a bowl or a sauce pan heat it up.  Once you have it warm enough put it on top of the lettuce and add some cheese, Sour cream, avocados and come crunched up corn chips!  Yummy love taco salad hope you enjoy it as much as we do.

Tuesday, April 5, 2011

Make him moan and groan chicken tortilla soup!

I must say all I heard from my Hubby while eating this soup was moans and groans....please lets keep our minds out of the gutters now!  But really he LOVED it and so did I.......Now a traditonal tortilla soup has the tortillas right in it.  I have a thing about soggy stuff!  I don't know I just could not do it!!!!! so what I did was put some oil in a pan and crisped them until they were golden brown.   Then put them on top of my soup right before I was about to serve it. 

This was super easy to make and serves about 8 people!  Would be great to make and put in the freezer......just don't put the tortillas in if you are going to freeze it.  You can add them afterwards when it is defrosted.

Alright so here it is enjoy!


Ingredients
1 Roasted Chicken from the grocery store
1 Tablespoon Olive Oil
1-½ teaspoon Cumin
2 teaspoon Chili Powder
2 teaspoons Garlic Powder
1 teaspoons Salt
1 cup Diced Red Onion
1/2 Diced Green Bell Pepper
1/2 Red Bell Pepper
3 cloves Garlic, Minced
1 can (10 Oz. Can) Rotel Tomatoes And Green Chilies
32 ounces, fluid Low Sodium Chicken Stock
3 Tablespoons Tomato Paste
4 cups Hot Water
2 cans (15 Oz. Can) Black Beans, Drained
3 Tablespoons Cornstartch
5 whole Corn Tortillas, Cut Into Uniform Strips Around 2 To 3 Inches

FOR THE GARNISHES:
Sour Cream
Diced Avocado
Diced Red Onion
Salsa Or Pico De Gallo
Grated Monterey Jack Cheese
Cilantro

Preparation Instructions
Shred up the chicken and put aside. Mix up the spices.

Heat 1 tablespoon olive oil in a pot over medium high heat. Add onions, red pepper, green pepper, and minced garlic. Stir and begin cooking, then add the spice mix. Stir to combine, then add shredded chicken and stir.

Pour in Rotel, chicken stock, tomato paste, water, and black beans. Bring to a boil, then reduce heat to a simmer. Simmer for 45 minutes, uncovered.

Mix cornstartch with a small amount of water. Pour into the soup, then simmer for an additional 30 minutes. Check seasonings, adding more if needed—add more chili powder if it needs more spice, and be sure not to undersalt. Turn off heat and allow to sit for 15 to 20 minutes before serving.

Now I don't like the tortillas cooked in the soup but if you do add them Five minutes before serving, gently stir in tortilla strips. What I do is fry up the strips in some oil until golden brown then put them ontop of the soup.

Ladle into bowls, then top with sour cream, diced red onion, diced avocado, pico de gallo, and grated cheese, if you have it! (The garnishes really make the soup delicious.)


*Adapted by The Pioneer Woman*